Showing posts with label Painting. Show all posts

Sunday, November 3, 2013

DIY: Painting wood paneling

When we moved into our house we knew we had to paint the sunroom. The vibe was too lodge - but it's painted now!! (Don't mind the random things on the table. It's displaced due to another project going on in the house - as always)
 
 
Here's the steps we took to paint the room
 
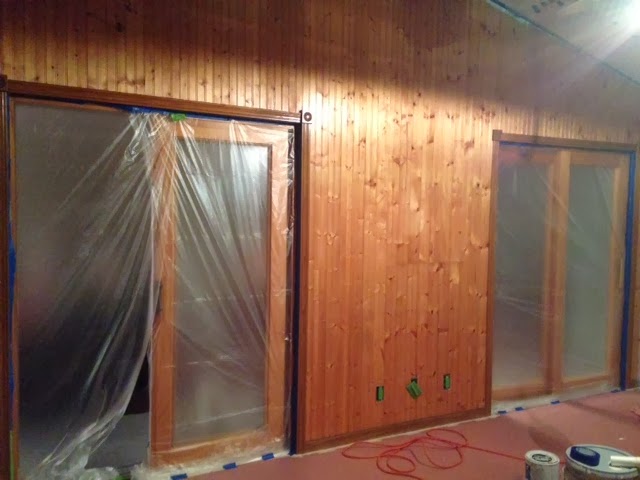
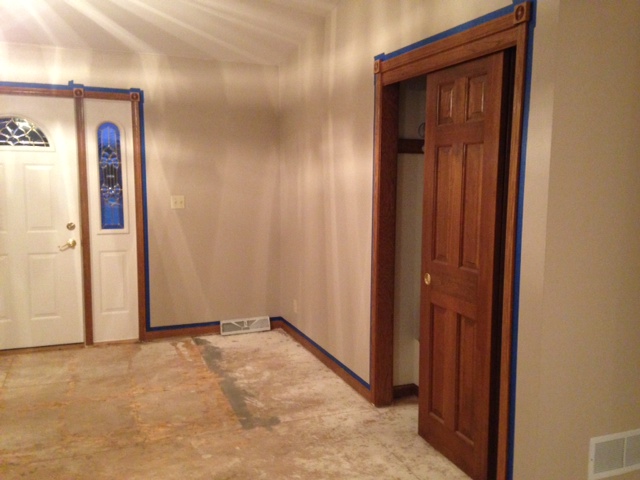
1. Tape off everything. We taped off the floor (with rosin paper). We taped off the windows. And then we taped plastic over the already taped off windows (This double layered taping really helped with the take down - because in the past we've had to use a pocket knife to "encourage" the tape off due to paint build up. But with the two layers, it peeled off swimmingly!). We taped one door off completely (I chose to paint inside the door frames by hand to make it easier). For the other door, we used two sheets of plastic that over-lapped so we could get in and out of the room.
 
 
2. Painted the ceiling. Our ceiling was green originally so we chose to paint it white before painting the walls. Since I share the good, the bad and the ugly, I'll share this. For the ceiling paint, we used left over ceiling paint from the old owners. Even though it said "brilliant white," it ended up with a slightly pink hue. We thought it may just be reflecting the red rosin paper on the floor so we kept going. In case you were wondering, it wasn't reflecting. So we ended up having to paint the ceiling again at the end up the project. This worked out because then we were able to caulk between the wall paneling and the ceiling, and then paint over it. It gave it a more finished look in the end. But still - pinkish ceiling paint!?
 
 
3. Paint. Paint. Paint. We chose to use a spray gun since we had A LOT of painting to do. Reading the direction, we realized we would need to thin out the paint. So following the directions, we used the Paint Easy paint thinner. And then we started painting. For this, I would DEFINITELY use a mask of some sort. There was an intense haze going on so we Mike would do one wall and step out for fresh air. Then go back at it. Probably not the safest, we know. We worked our way from top to bottom on a wall


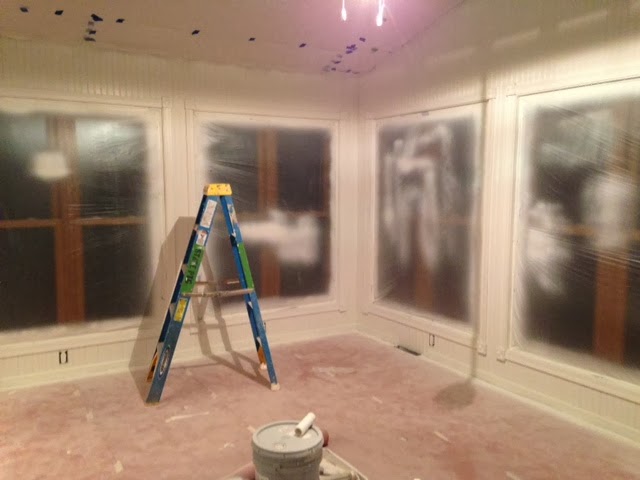
(The tape you see on the ceiling was use trying to keep a clean line between the ceiling and the wall. This was before we ended up realizing we would need to simply paint the ceiling the same color as the wall.)
 
5. Clean up. We I took down all the tape and plastic. You can see in the picture below the two layers of tape we did. The first layer of plastic/tape had all the paint build up. So the second layer of tape was easy to take off and keep a clean edge.


Done, right? That's what we thought, but not so much. Even though we used a sprayer to paint, it didn't get into all the nail holes and crevices of the panels.


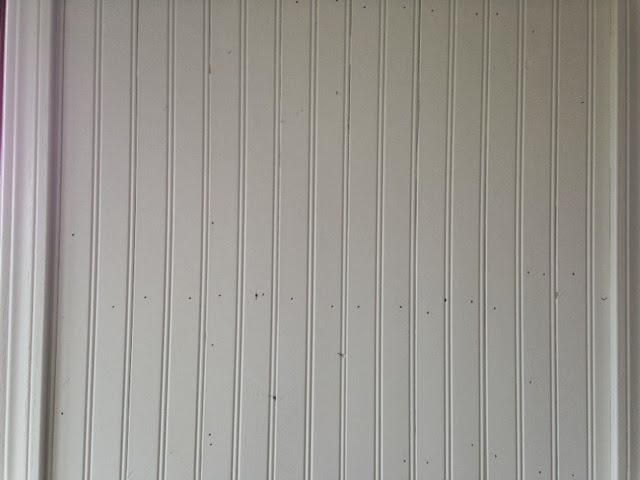
And let me tell you, there were a lot of nail holes. Thankfully, my dad is the best and wanted to lend a helping hand. So we got to work filling in the nail holes with Elmer's Wood Filler in white. Then we repainting (by hand with a foam brush), over the wood filler. We also used a foam brush to get paint into the crevices so the paneling didn't look like it had random gaps all over the wall. In hindsight, I wish we had filled in the holes between paint coats two and three so we wouldn't have had to repaint over the wood filler.
 
 
But I suppose it all paid off - look at these before and after pictures!


Needs decorations, I know. 


Friday, September 20, 2013

Island Time - Part 2

After building the island, it needed a little lipstick to make it pretty. So I followed the same steps we did for painting our bathroom cabinets in our last house

Deglossed

Primed

Painted (ended up being 3 coats)
 
I'll post pictures soon with our new flooring! I'm in love!

Island Time!

Unfortunately the title of this post isn't referring to a getaway vacation (I wish). I'm talking about building a kitchen island. Ever since moving into the house we knew this big 'ole kitchen was begging for an island. See the space below from when we moved in


Before being able to lay down the flooring, we knew we needed to get to work on the island. While a custom-made island would have been wonderful, it just didn't fit into the budget. After walking about Menard's and Home Depot's island/cabinet areas, we wandered into the free-standing cabinet island. Bingo! We found two sets of cabinets that we could pair together. It was the perfect width (at a minimum the spacing between cabinet and island counter tops should be 3') and beautifully in our price range. So we brought them home...


To secure them to the floor, Mike drilled 2x4 planks into the ground. We, then, set the island over top of them because the shelves create a natural gap at the bottom. See below, Mike drilling the island into the already secured 2x4's
 
 
Because we used a basic set of cabinets (which we secured together), we had to put some sort of back on the cabinets to give it a finished look. We chose wainscoting for the back, which we bought in planks similar to this. To secure the wainscoting, we used wood glue. Because the planks fit together with a tongue-and-groove system, we put glue in the grooves to make it more secure.
 
 
Note: We taped the boards together and let the glue bond for 24 hours. After this, we used the same glue to secure the wainscoting (now) board to the cabinets. Mike went a little crazy with the glue the next day...


Again, we let the glue bond for 24 hours and taped it for extra security.


To add the finishing touches, we bought base and corner material. Mike used the miter saw to cut the pieces to the correct lengths and angles


Next up - more painting! (P.S. You may be wondering about the counter top. It's actually an old door that was doubling as a workbench tabletop in our basement. It was left behind by the old owners, so we're putting it to good use until we can afford new counter tops. I'm still brainstorming finishing ideas in the meantime!)

Sunday, August 18, 2013

Front Door Makeover

Here's a brief tutorial on the steps I took in repainting our front door. The "before" pictures is below, and what you can't see are all the streak marks and uneven coating from the previous paint job. I'm also not a huge fan on how the front door color blends in with the color of the house. There's no focal point, and I read somewhere that the front door color is one of the number one things that can improve curb appeal.

 
#1: Remove hardware. With this step, I noticed that the paint from the last paint job had built up around the hardware. So I sanded it down to make it flush with the door. This will help whenever we replace the door handle - the shape may or may not be the same. I also taped off the door on the edges and window.
 
#2: Prime. As always.
 
For the next steps, see the nifty diagram below. Note that this is only with the first coat. I ended up doing three coats of paint to get the desired coverage. We used Dutch Boy's Dungeon Bronze exterior paint in high gloss.


Here are a couple official "after" pictures! When we first moved in I wasn't a huge fan of the exterior because of the mortar and trim having a red/pink tint to them. So now, I like that the new front door color picks up the brown in the brick. Now I just need to decorate...


The Power of (White) Paint

This is going to be a short and sweet post. I love white paint (which I'm sure you've all gathered by now considering I've painted two kitchens white and all of the base/trim in our houses). Here's a great series of pictures that shows the true power of white paint!

Taped off and ready to go!
 
Coat of primer and one coat of paint
 
 Done! (well, at least the trim is)
 
The space is so much brighter and lighter. And I'm really digging the darker door with white trim. Another part of the house that the white trim made a huge difference was the hallway with all the bedrooms, bathroom and linen closet (removing the carpet didn't hurt either).
 
 
Another post to come about our other painting projects around the house!

Monday, August 12, 2013

Slowly but surely

I haven't forgotten about posting! I promise! Our project is just taking longer than we originally thought. Probably part because we're busier than normal - soaking up what's left of summer - and because we're starting to remember what a pain deglossing, priming, and painting (three coats) is! In this house, we Mike taped everything off. It's making priming and painting easier but definitely took a lot of time.

So far we've deglossed and stripped all of the wood trim and baseboards, which took a lot longer than expected. I didn't realize how much we had! And on top of that, you have to make sure you use a little elbow grease so you're really getting the stain off. We've also gotten the coat of primer on everything, along with one coat of paint. Here's what it looks like as of now (we're leaving the doors dark; this is going to be my mixed wood house)


I think the back hallway with all the bedrooms already is looking brighter with the wood removed. Mike and I were talking about it last night and came to the conclusion that the wood trim was making the paint colors seem dull. It's already making a big difference so at least all the work is starting to pay off! And in case you're wondering, here's a picture that shows the difference between primer (on the bottom) and the first coat of paint (on the top). Only two more to go!
 

P.S. We're using the same deglossing, priming and painting process that we did on the kitchen cabinets (which is a little bit different than our first kitchen tutorial)

Monday, July 29, 2013

Time Flies When You're Having Fun

I laugh typing that title because one part of me is furiously nodding and the other part is just furious. The past couple weeks have been full of painting. We've painted the entire house (again) excluding the four seasons room. And last week we moved onto painting the kitchen cabinets (I'm a sucker for white cabinets as you all know). We just finished priming/painting. I literally mean just finished - I may be getting white paint on the keyboard as I type.
 

Here's the visual updates so far. I've put the paint colors we used by each picture. We ended up using all the same colors as the last house since we had a lot left over (apparently we were nervous about running out; so nervous that we had multiple untouched gallons).

(SW: Diverse Beige)
 
Don't mind all the crap in the living room. The only thing in it's right place is the TV. We have a new sectional couch on order and the blue chairs against the back wall will find a another home problem in the sunroom. Of course, wall art will be coming soon once things are more in order.
 
 
I need to find a new light fixture ASAP. We're also painting on the trim/base white. I can't wait for it too look fresh and clean! Clean in general is probably more like it. See below for where all our paint clutter is sitting.


Well, here and in the sunroom. But see here! These are the last round of cabinet doors we needed to paint. And that, my friends, is the final coat drying tonight!


Here is the kitchen as of now. The first round of doors we painted are hung. We're waiting on our hardware. I'll post a tutorial for that once we get there!
 
 
(Kitchen Cabinet paint: Zinser's primer, Benjamin Moore's Cloud Cover White)
 
We tried a new method for painting the cabinets. See our tutorial from our first house here where we sanded all the cabinets down before deglossing, priming and painting three coats of paint. Instead of sanding, this time we used Zinser's Paint Deglosser and Zinser's Strip Fast. After a coat of each (make sure to follow the directions for drying time), we went straight into priming. We ended up doing three coats of paint after the primer to get the coverage we wanted.
 
 
Anyway, back to the two week tour of the house. Here's the guest bathroom:
 
 
(SW: Monorail Silver)
 
I'm side tracking on the tutor to show you what some metallic spray paint and 3 new $7 glass bulbs (from Menard's) can do! The "before" light picture is from our master bathroom and the "after" is clearly in our guest bathroom. But the light fixtures were the same in both, so it works right?


And here are the two guestrooms (sorry for the different angles):
 
(SW: Sandbar)
 
 
(SW: Evening Shadow)
 
Finally, here's the master bedroom. The pink blinds still give me shivers. Yuck. And I have no master bathroom picture because absolutely nothing has been done to it. Besides putting our stuff in it!
 
(SW: Monorail Silver)
 
Well, that's the short tutor. More to come!