Sunday, August 18, 2013

Front Door Makeover

Here's a brief tutorial on the steps I took in repainting our front door. The "before" pictures is below, and what you can't see are all the streak marks and uneven coating from the previous paint job. I'm also not a huge fan on how the front door color blends in with the color of the house. There's no focal point, and I read somewhere that the front door color is one of the number one things that can improve curb appeal.

 
#1: Remove hardware. With this step, I noticed that the paint from the last paint job had built up around the hardware. So I sanded it down to make it flush with the door. This will help whenever we replace the door handle - the shape may or may not be the same. I also taped off the door on the edges and window.
 
#2: Prime. As always.
 
For the next steps, see the nifty diagram below. Note that this is only with the first coat. I ended up doing three coats of paint to get the desired coverage. We used Dutch Boy's Dungeon Bronze exterior paint in high gloss.


Here are a couple official "after" pictures! When we first moved in I wasn't a huge fan of the exterior because of the mortar and trim having a red/pink tint to them. So now, I like that the new front door color picks up the brown in the brick. Now I just need to decorate...


The Power of (White) Paint

This is going to be a short and sweet post. I love white paint (which I'm sure you've all gathered by now considering I've painted two kitchens white and all of the base/trim in our houses). Here's a great series of pictures that shows the true power of white paint!

Taped off and ready to go!
 
Coat of primer and one coat of paint
 
 Done! (well, at least the trim is)
 
The space is so much brighter and lighter. And I'm really digging the darker door with white trim. Another part of the house that the white trim made a huge difference was the hallway with all the bedrooms, bathroom and linen closet (removing the carpet didn't hurt either).
 
 
Another post to come about our other painting projects around the house!

Monday, August 12, 2013

Slowly but surely

I haven't forgotten about posting! I promise! Our project is just taking longer than we originally thought. Probably part because we're busier than normal - soaking up what's left of summer - and because we're starting to remember what a pain deglossing, priming, and painting (three coats) is! In this house, we Mike taped everything off. It's making priming and painting easier but definitely took a lot of time.

So far we've deglossed and stripped all of the wood trim and baseboards, which took a lot longer than expected. I didn't realize how much we had! And on top of that, you have to make sure you use a little elbow grease so you're really getting the stain off. We've also gotten the coat of primer on everything, along with one coat of paint. Here's what it looks like as of now (we're leaving the doors dark; this is going to be my mixed wood house)


I think the back hallway with all the bedrooms already is looking brighter with the wood removed. Mike and I were talking about it last night and came to the conclusion that the wood trim was making the paint colors seem dull. It's already making a big difference so at least all the work is starting to pay off! And in case you're wondering, here's a picture that shows the difference between primer (on the bottom) and the first coat of paint (on the top). Only two more to go!
 

P.S. We're using the same deglossing, priming and painting process that we did on the kitchen cabinets (which is a little bit different than our first kitchen tutorial)

Tuesday, August 6, 2013

Happy 2nd Anniversary!

We're taking a break from house projects to celebrate our second anniversary! It's crazy how another year has flown by. It truly is a case where time flies when you're (in love) having fun. So while we relax together, I'll leave you with what I've learned this past year.

It's all about having fun together. And it doesn't have to be dramatic, adventures around the world type of stuff. It can be simple and wonderful. Like when we tried to install a light fixture in the dark because we had to turn the breaker off. Or when we have spaghetti night and Mike experiments with ingredients (and I drink wine) trying to find the perfect sauce to call our "family recipe." Or even the smallest memories like when we buy each other the same "thinking of you" card. Or when we know exactly what the other person is thinking and laugh out loud before anything is ever said.

That small stuff. That laughter. That's exciting. Nothing's better than truly enjoying the company you're with. And lucky for us, it's only just begun!

Sunday, August 4, 2013

Flooring Update - Part 2

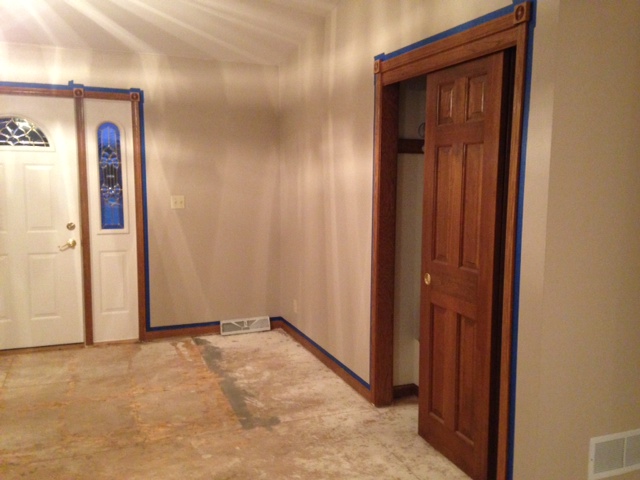
This weekend we went to town on removing the old carpet in the great room and vinyl flooring in the kitchen. We Mike first started in the kitchen. He pulled up the flooring in pieces by simply (probably not simple to him) cutting and pulling it up.


Then he had to go over the floor with a scrapper to get al the extra glue and paper off the floor.
 
 
Then to our dismay, we also realize the vinyl had been glued onto underlayment. We had to remove this because otherwise the great room and kitchen wouldn't have been level. At first we were worried that the underlayment was glued down. Luckily (as lucky as this could have been), it was stapled down. So Mike was able to chip away the underlayment.


However, this left a sea of staples. Fast forward a couple hours, we sat and hammered them all into the existing subfloor. Thank God I have the most amazing dad who helped us out.


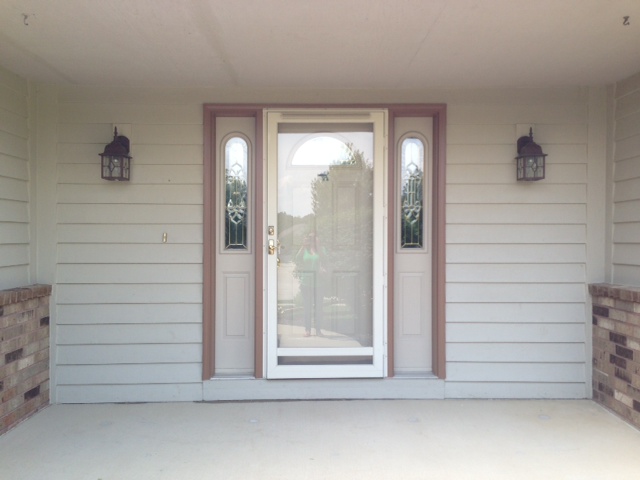
Before that though, we had to remove the carpet and tile that surrounded the front door. The carpet was a quick and easy removal. We cut and rolled it up into pieces. What we thought would be the harder part was the tile in front of the door.
 
 
But all it called for was a little elbow grease. And, again, some great dads! First, Mike use a screwdriver and hammer to pry up the tile.
 
 
To our surprise, the tile popped off easily.
 
 
The next part in the process was to remove the platform that the tile was applied to (it made it level with the old carpet). Mike had to use the drill to unscrew it from the subflooring.
 
 
Then Mike wedged the platform up. And this is wear the elbow grease comes in....


We're so excited to have gotten it done in one day. We only had one injury too! I'm telling you - I leave for an hour and Mike injures himself. He had to go get stiches on his finger because he destroyed it during the demo. Don't worry - he's fine now.
 
Anyways, the end result doesn't look all that pretty now, but it will! We're hoping to install the new flooring sometime this week.


Oh, and it got a little dusty during the demo...


Flooring Update - Part 1

Moving into this house we knew that we wanted to rip up the flooring and put down a seamless wood floor. The space is just calling for it right?
 
 
So we bought a lot of floor. A LOT of flooring. 1100 square feet to be exact. It's currently sitting in our four seasons getting acclimated to our house temperature (most flooring needs to sit in it's new home for at least 48 hours).
 
 
The first part of our demolition process was the kitchen. It was suppose to be a simple removal because it was laminate wood that snapped together. Then we found two more layers of cheap vinyl flooring.
 

The laminate wood only took us a half hour to pull up. The boards were so flexible they literally pealed off the floor.

 
We decided that the vinyl underneath would be a more difficult task so this is where we called it a day. Because it was a weeknight. And I wanted to eat dinner.


So this weekend we really went to town! I'll post about that tomorrow!

Kitchen Cabinets Complete

Our cabinet doors are hung up and the hardware is installed! WooHoo! Here's a brief tutorial on how we installed our hardware. This was a little bit different than the first time because in our last house it was a blank slate. The previous owners had now existing hardware so we were able to drill holes wherever we pleased.

However, in this house, the cabinets already had holes drilled where the previous hardware had been. So instead of using wood putty and sanding down each hole, we chose to work with the existing holes for the knobs on the doors. However, for our drawers, we chose pulls that could cover up the existing holes. See below! (Please excuse the hideous countertops)


First, we Mike measured the width between the holes


Then we assumed (maybe that's too trusting - but I also think Mike measured) that the existing hole was correctly centered. So Mike divided the width of the previous measurement and marked the distance. Using a piece of tape helps with marking these measurements. It also keeps the wood from splitting when drilling the new holes.

 
It's literally that simple. Mike drilled holes at those markings and the screws tightened from inside the drawer. So simple and so lovely!
 
 
Oh, and in case you're wondering how we remembered which doors went where, I made a diagram where all the doors were numbered. It's not the prettiest looking thing but it definitely helped. We just taped a number on each door and, while painting, we put the number on the table so we could match them back.